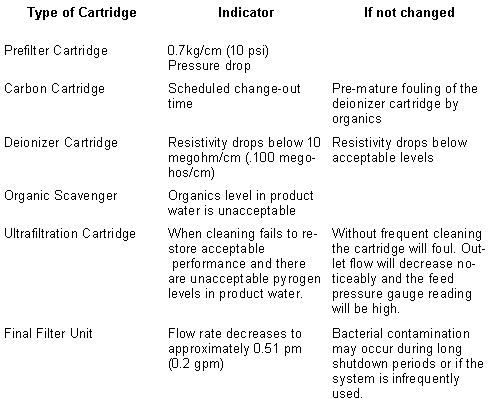
REPLACEMENT It is a good practice to replace all cartridges together on a regular basis according to a schedule, however they will sometimes need replacing at more frequent intervals depending on your feedwater quality. The following chart will help you determine when additional replacement may be necessary.
Close the feedwater supply valve. Turn off water pump. Open 3-way valve, relieving internal pressure. Remove housing bowls. Take out old cartridges. Remove tubing from tube connector on the 3-way valve. (This disconnects the final filter unit from the system.) Remove tubing and connector from the filter unit. Discard old cartridge and replace with new. Reconnect.
*The insides of the bowl and heads should be cleaned each time cartridges are replaced.